Disclaimer

Disclaimer: We do not encourage the cultivation of illegal or invasive plants. All images are the Property Of Australian Ethnobotany and Sustainable Gardening
Showing posts with label Australian Ethnobotany. Show all posts

Monday, 28 November 2016

Scale Treatment on Cacti & Succulents


Introduction and Identification of Scale

Close up of Scale on Cacti
Scale is a common pest of cacti and succulents in particular those who are stressed for any number of reasons. Scale can be identified by small, commonly white, black or brown, circles on the flesh of the plant which can be "flaked" off easily and have a speck in the centre usually of a darker color (see scale close up image). Scale insects can over time leave permanent damage to the flesh and also stunt growth. This method will not kill the pests completely and the underlying sources of the infestation should be investigated, some common causes include:- Sun/Heat Stress, Under watering, Over watering, poor soil quality, nearby plants in poor health among many others.

This method should be performed later afternoon in a shaded area with no direct sunlight for the duration where possible. While not covered in this particular guide as yet, i may add it in later, potting the plants into fresh soil and utilizing this time to check the roots for root mealy bugs, scale and fungus gnats is advised.

Equipment

 - Toothbrush
 - Dishsoap
 - Neem Oil (optional but advised)
 - Cup
 - Spraybottle (waterbottle with hole pricked in lid is sufficient)

Goal

The ultimate goal with this technique is to remove all the scale insects from the flesh of the cacti and to hopefully kill them through suffocation in the soap suds/neem oil. Ongoing treatment of the plants infected will be required until the pests stop re-infesting, harsher options are available but this method works well enough.

Technique

1) Quarantine

The first thing you want to do is get all plants with scale away from those which are healthy. Place these onto a table somewhere away from your collection and at an easy working height. If you find any particular cuttings or plants that are particularly sick remove them and discard or mark for ongoing quarantine and more frequent/invasive treatment. As can be seen from the below photos one of the pups planted next to this particular cacti is dying off and seems to be a source for infestation, as such it is removed and destroyed.


2) Brush Down

You want to prepare a mix of dish soap (or neem oil if there is a substantial infestation) and water and mix together well. Using an old toothbrush thoroughly brush the surface of the plant ensuring all scale is removed. Give a final brush with an excess of soapy water and sit aside while wet for later. You may wish to rinse and repeat this step to ensure you get all the scale.

It is advisable to rinse the tooth-brush between brushes to remove any excess scale that you can.


3) Clean Down

After leaving the plants to sit for an hour or so gently wash the surface giving it another quick brush and final rinse. I prefer to use a pressurized sprayer but a plastic bottle with a hole in the lid also works fine. Keep in a shaded area the following day and do a final rinse down and put the plants back out.


4) Ongoing Maintenance

Check the plants every few days over the first fortnight. Just using a brush and water you can quickly clean them off.

After the first two weeks give a full neem oil scrub down to really stamp out the pests. Continue with this for approximately two months or until you manage to nurture the plants back to health ensuring any underlying conditions are fixed.




Friday, 8 April 2011

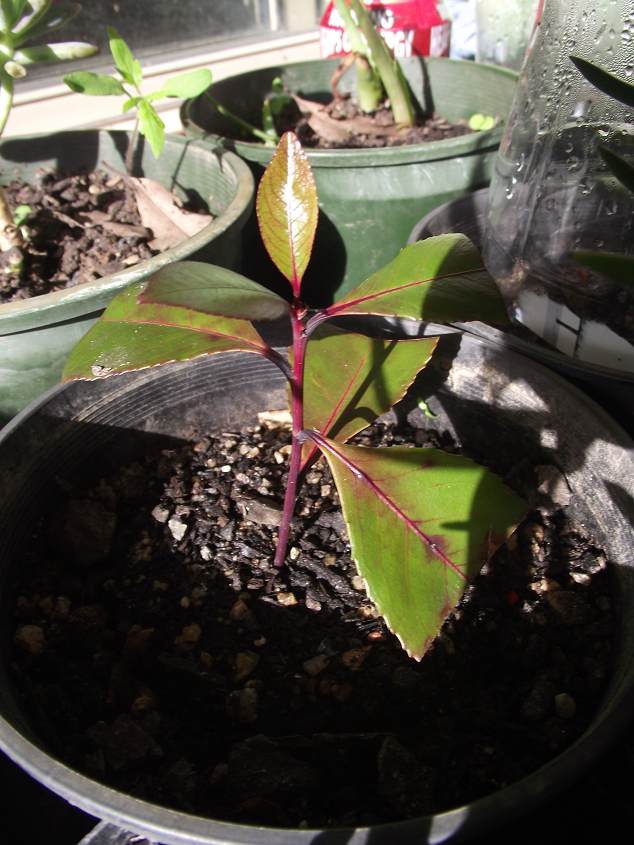
Catha Edulis Propagation from Cuttings and Layering

Introduction

With many mixed reports into the feasibility of cloning Catha Edulis we decided to give it a go ourselves and so far have been pleasantly surprised. We have taken 4 cuttings each of which has survived easily to the 10 day mark with 1 cutting starting to throw new growth already ! The method used was also one of the most primitive cloning methods out there. We will run through the entire process used to take 4 cuttings for you below, obviously this can be scaled according to the amount of cuttings you are taking.

Materials


2 x 2L Coke Bottles (i used 1.125 so they would fit my pots but larger is better)
4 x 150mm+ Pots
1 x cup of water
Soil - We used an 80/20 mix of recycled soil/cacti and succulent mix
clonex/cloning powder - we used clonex purple as it was what we had
Scissors
Razor-blade (recommended for taking cuttings but sharp scissors will do)

Our choice of soil was purely due to lack of other materials. However in saying that Catha Edulis loves rocky or regular soil anyway.

Step 1 - Prepare your materials

Cut your coke bottles in half. i prefer to give the lid side a bit more height as it wont have the width at the top like the base. Try to keep the cuts so they are straight otherwise it wont rest properly in the soil.

Make up your soil mix, or just use regular potting soil and fill the pots to a 20mm below the top of the pots. After this compress the soil softly and use a stick or something similar to poke a hole in the centre around the same size you anticipate your cuttings to be, a bit larger is better as when you water it and compress later the stem will be secured.


Step 2 - Taking your Cuttings

Catha Edulis Red Cutting
Semi-Rooted (day 5)

For this step we recommend using a sterilized razor blade as it won't crush its way through the stem but rather slice through without damaging the cells around the wound too much. However there has been no REAL noticeable difference in the effectiveness of cutting method used, these cuttings were taken with scissors.

You will want to select a semi-mature branch and cut roughly 6-8 leaf nodes from the tip. Try experimenting with variations relating to their maturity. We have found that despite everyones warnings about how hard Khat is to clone that it is infact relatively easy for the common household gardener.

Make your cut by bending the branch slightly and cutting through at a 45 degree angle for optimal root development space, straight cuts are not recommended for any plants. After this try to get them straight into the cup of water as it will keep them far more sterile. After you have your four cuttings remove the lower half of the leaves and trim the larger ones at the top in half.


Step 3 - Planting your Cuttings

Home Made Catha Edulis
 Propagation Chambers
Now you will want to gather all your pots, coke bottles, the clonex and cuttings in the one location. Check that the holes you made are far deeper than you intend to plant the cutting (all the way to the base of the pot would be good for the centre hole) as well as wider than the cuttings.

Remove a cutting from the water and dip it in the clonex trying to get a really thick coating on it, quickly move it over the pot ad allow the excess clonex to drip off into the hole you made. Re-dip the clone into the clonex planting it in the soil this time. Gently compress the soil around the clone and give it a very soft water to help the soil settle around the cutting, you want to drench the pot but do it slowly so you dont wash the clonex away too much. Finally site the coke bottle over the top and press it down while twisting slightly until it is roughly 20mm into the soil. Repeat for each cutting.


Step 4 - Keeping them alive until they root

Catha Edulis Red Cutting
 Day 10
All we have done for our cuttings is apply a small amount of water when the condensation on the coke bottle starts to get a bit thinner. We also try to take the bottles off for 5 minutes every couple of days as the air in the coke bottle would have pretty much purely cleansed oxygen. We feel that photosynthesis must be promoted to encourage the plant to survive and generate roots.


Step 5 - Around 1 Month from Propagation


a further eleven days down the track and all 4 cuttings are still surviving. Two far stronger than the rest however they all appear to have struck and i am tempted to risk losing one for the sake of checking if this is true. Wish i had used clear cups for propagation so i could see for sure as the roots would be showing through right now otherwise i will have to wait and see. But the new growth is pretty substantial so i would say they are pretty safe now as for the first bit they just sat dormant whilst developing roots much like any other clone i have taken in the past.


We have now also tried layering some of our branches and had much success with this as well. I dug a small "trench"around 5cm deep placed a branch in covered it over and sat a rock on top. Had roots enough to hold itself down within a week. At this point i will now cut them off from the main plant and carefully pull the cuttings out. I will add pictures over the next few days of this process as well.


Friday, 1 April 2011

Rivea Corymbosa (ololiuqui) (coaxihuitl)


Introduction

Rivea Corymbosa is another plant we have recently attempted to germinate with limited success. For the time being this post will just be images i will update with some more information on Rivea Corymbosa in the near future. The love heart leaves remind me of a HBWR quite a bit and i think they are a very beautiful plant even whilst not flowering.

Rivea Corymbosa - Seedling Stages


The two forked "Baby Leaves" that emerge upon
the seedling breaking free of the seed.
Love heart shaped "True Leaves" starting
to form a few weeks later.

Rivea Corymbosa Plant starting to get more of its true leaves.
We are coming out of growing season so growth has slowed dramatically.
This image is taken 4 weeks after the previous.

Rivea Corymbosa - 2 months down the track


After having only had 1/8 seeds germinate immediately we have since had a further 3 seedlings pop up at 4, 5 and 7 weeks respectively. This shows that while initial germination rates were down that the plants do still perform quite well even if the seed stock is quite old. We are not having much growth at present as it is no longer the growing season however considering how cold the beginnings of winter are becoming i am extremely happy with their development.

Monday, 21 February 2011

Salvia Officinalis Germination and Growth


Introduction

Commonly referred to as Sage, Garden Sage or Kitchen Sage. Salvia Officinalis is used widely around the world as a cooking herb but is also believed to have some effect in countering Alzheimer's. We have accidentally planted our stock in the wrong season and are noting extremely slow but consistent growth. Even from the first set of real leaves the scent is extremely strong and could easily be used as a wonderful perfume.

Roughly 1 Month from Germination

On day 11 we have seen a 85% Germination rate. They are planted in a regular free draining potting mix, that was mixed with some mulch, in communal pots and were potted out after 26 days into individual pots to allow stronger growth. The plants have a wonderful scent already and when repotting it could be smelt all around the yard and even throughout the house.

Salvia Officinalis Seedlings
In communal Pots at 3 weeks
From Germination
Salvia Officinalis Seedling at
around 1 month from Germination